
How to Batch Edit Your Photos in Lightroom Classic and CC For 2025
You may be expecting what’s batch edits in (Lightroom Classic and CC) Let me tell you that in Lightroom Classic and Lightroom CC, you no longer need to edit your photos and videos one by one. This can importantly reduce the time required. You can edit all your images at once. With just a few clicks can apply the settings to many different photos I have a perfect outline for you. If you Blurred Pictures you can quickly move on to this article
In this article, we will explain different methods of using batch in Lightroom Classic to edit our photos better in one go. With its user interface creatures can smoothly edit, select, and adjust the settings to their editing workflow to save precious time. Now!! let’s start with our article.
4.9
APPROVAL
10.3.1
VERSION
What is Batch Editing in Lightroom Classic and CC?
Batch editing is a feature of Lightroom that allows you to edit one photo and have all the other photos that you choose be edited the same mutually so you don’t have to each photo one at a time you can do and apply it to all the other images and it saves so much time. I am using Lightroom Classic is the other version of Lightroom and it does not support batch editing in the same way. Lightroom Cc can only do batch editing by copying the settings from one photo and pasting it to the others correct me if I’m wrong.
However is way better CC has features missing the classic still has and I love Lightroom Classic it’s not out of date it’s not old just get classic please because it’s way better. So with that out of the way let’s get to how to batch edit photos in Lightroom Classic. See also the Pro Lightroom Pro app
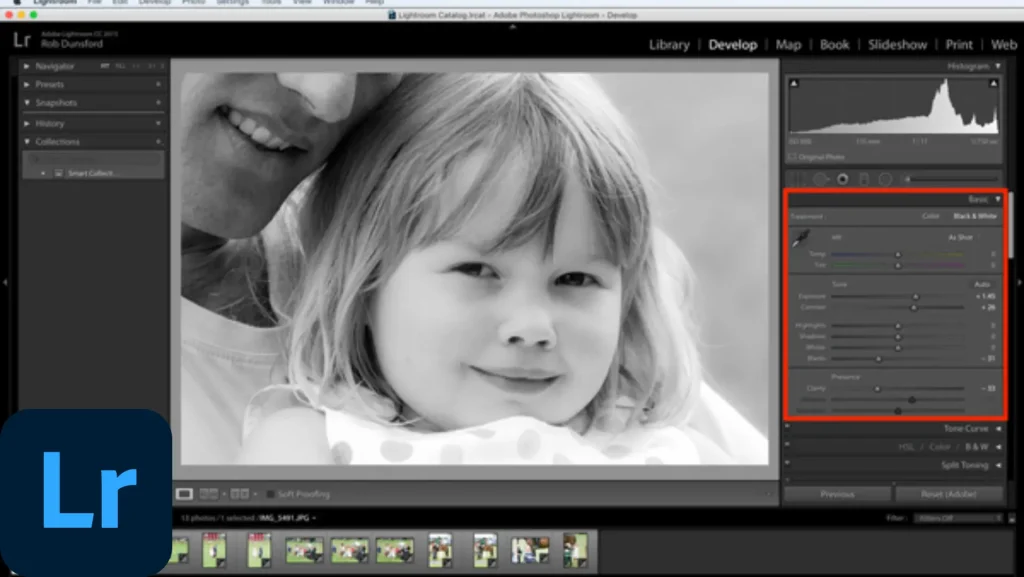
4(Steps that you can Follow and Easily Batch Edit your Photos)
There are a few steps are as below that you can follow and easily batch-edit your photos in Lightroom CC and Classic. So All the steps are carefully read.
(Step on 1): Multiple Photos Select Using Batch Edit with Shift
To Multiple select photos is with shift so if I click one image hold shift and click on the last image. Now I have an image range let me show you that again click on the first image hold the shift on the last image and we have you know neighboring photos consecutive photos whatever you want to call it and I can batch edit those so I am going select all the dark photos.
So I am going to Batch Edit these together from the library module you need to open you need to open this panel on the side if you don’t see it put your mouse over that very far right triangle and click on it so the panel stays there if you don’t I am going to automatically hide itself.
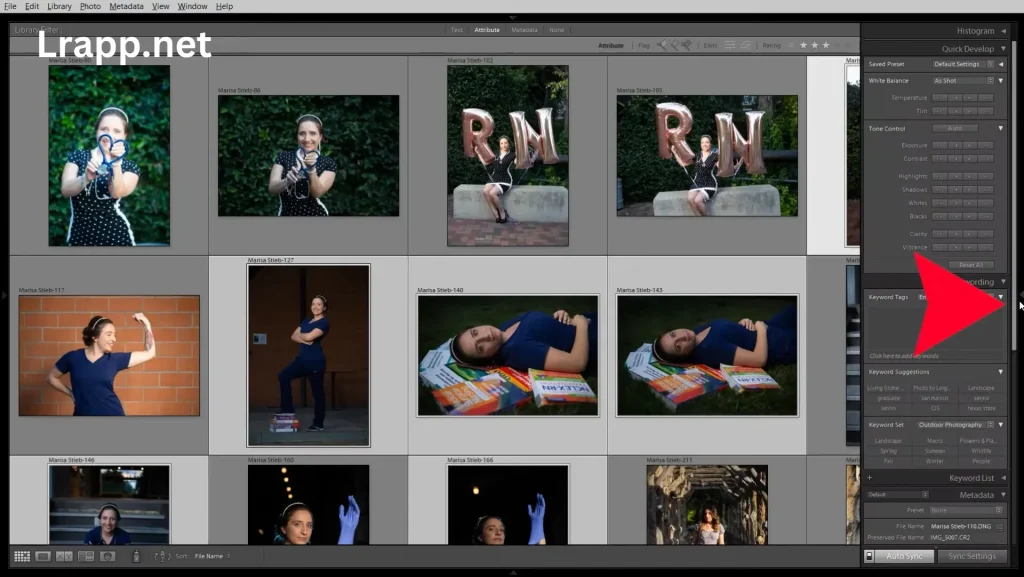
(Step on 2): Using Auto Sign in Lightroom Classic
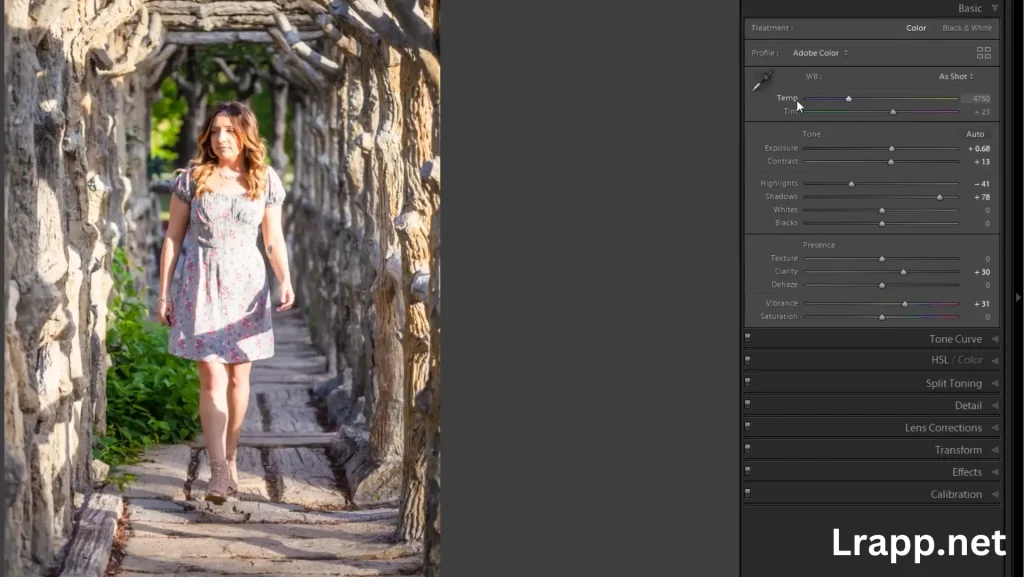
This is my favourite method you need to turn on the switch at the bottom right it is the secret of batch editing is a small little switch make sure that it is turned up so it’s top on the button that says auto sync doesn’t click on that just turn the switch on and you can any change make such as exposure will go across to all these photos instantly. If you don’t see these, uh quickly develop settings that you may have your tone control collapsed so click on this little triangle to show all other tone control settings to shrink down the develop mode.
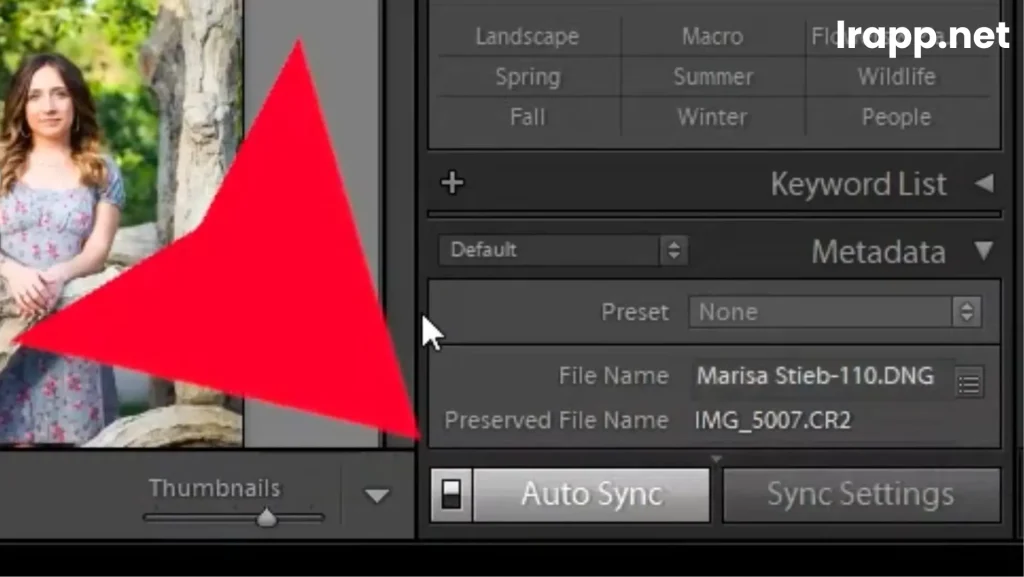
(Step on 3): Auto Synchronization Setting
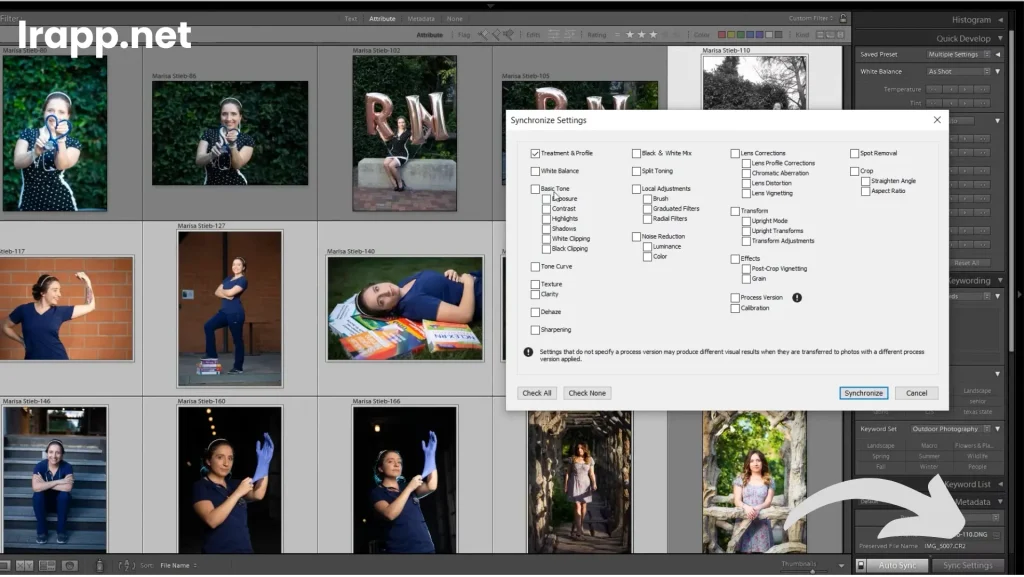
Synchronization setting across a range of photos but maybe not every single setting maybe a few let’s say you made an image black and white which you can do by selecting a photo and hitting the letter ”v” that converts a photo to monochrome and I want to send that setting but not all the others the rest of these photos you can do it synchronization setting here are a few guidelines that you can follow it.
- On the bottom right click check none so that none of these are checked and check the very first one which happens to contain the black and white you know edit.
- You just did with the letter ”v”
- you can of course check any of these other ones to send only these settings to the other photos and not every single setting so i have this first one checked and when it clicks synchronize it.
- Then just that treatment and profile you know data to all these photos and I’ll slowly update to black and white.
(Step on 4):Develop Module
In the develop module you can again click the auto sync if it’s down you can edit a photo but it won’t change any of the other images however if you turn it on any change you make goes across to all the different images see they all have that downward darkening curve on the right you can see it if I brighten this one all the others have the same setting because synchronize is the turned on so that is how you can edit on the photo and do what you like to it and those setting will be automatically applied.
To all the other photos your selected now if you have photos that were taken under different lighting like this one different white balance different everything be (careful) because your batch editing may screw up these more than the already white balance you know these photos are taking very different white balanced settings.
How to Batch Edit Photos in Lightroom Mobile?
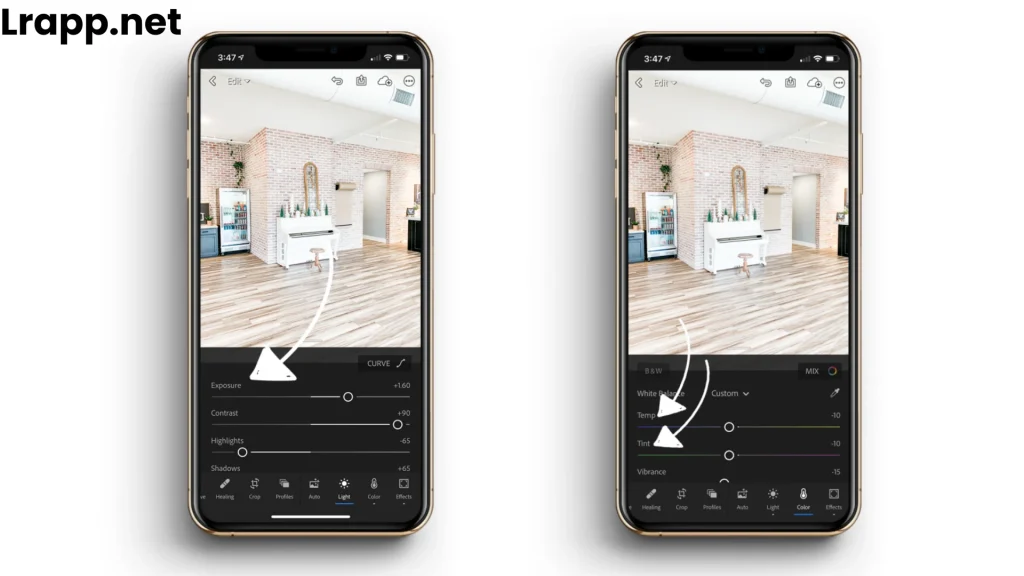
Batch editing in Lightroom mobile is a useful feature that allows you to apply the same adjustment to multiple photos at once. So here is how I can do it.
(Point no 1): Import your Photos
- First of all open Lightroom mobile and import the photo that you want to edit and you can also import it with your camera.
(Point no 2): Select the Photos
- Tap on the first photo you want to edit and open it.
- Tap the (three dots) icon in the top right corner and you can select from the menu.
- You can additional photos you want to include in the batch edit.
- Select Photos will have a blue checkmark.
(Point no 3): Apply Edits
- Once you have selected all the photos tap on the edit icon at the top bottom of the screen.
- Make sure you can adjustments to the first photo as required using editing tools like contrast etc.
Frequently Asked Question(FAQS)
Conclusion
In Conclusion!! Batch-Edit your Lightroom Classic is the simple copy-paste method. As you know we have explained the above four steps in great detail, in the first step we used to select our photos, in the second step we used auto-sign, in the third step we discussed the setting of auto-sign, and in the fourth step we discussed the develop module in detail so follow these steps.
you can batch edit your photos easily whether it’s Lightroom Classic or Lightroom Cc etc I hope you enjoyed this article and if you read how to smooth skin in Adobe Lightroom you can easily read this with just one click.

I am the founder of lrapp.net, I am passionate about bettering your photography experience with our expertly crafted Lightroom mod APK. With years of experience in photography and digital editing, I aim to provide users with unparalleled tools to unlock their creativity. Join us on this journey to elevate your images and transform your editing skills!


