
How to Retouch in Lightroom Classic Make Soft Skin in 2025
At any moment we take a photo of ourselves in Lightroom we want our facial skin to look soft in the photo. It is very important to improve the look of your face in your photo. Now you don’t have to worry because in this article I will tell you how to get rid of dark spots pimples and oily skin on your face.
So we will cover the 4 methods Which are Clarity, Reverse Clarity, Texture, and Radial Adjustment Brush Using these four methods use I will tell you how you can smooth your skin in Adobe Lightroom. If you have Batch Edit your photos you can move this tutorial. Now let’s start our article.
4.9
APPROVAL
10.3.1
VERSION
Method no 1:(Lightroom Use the Clarity feature)
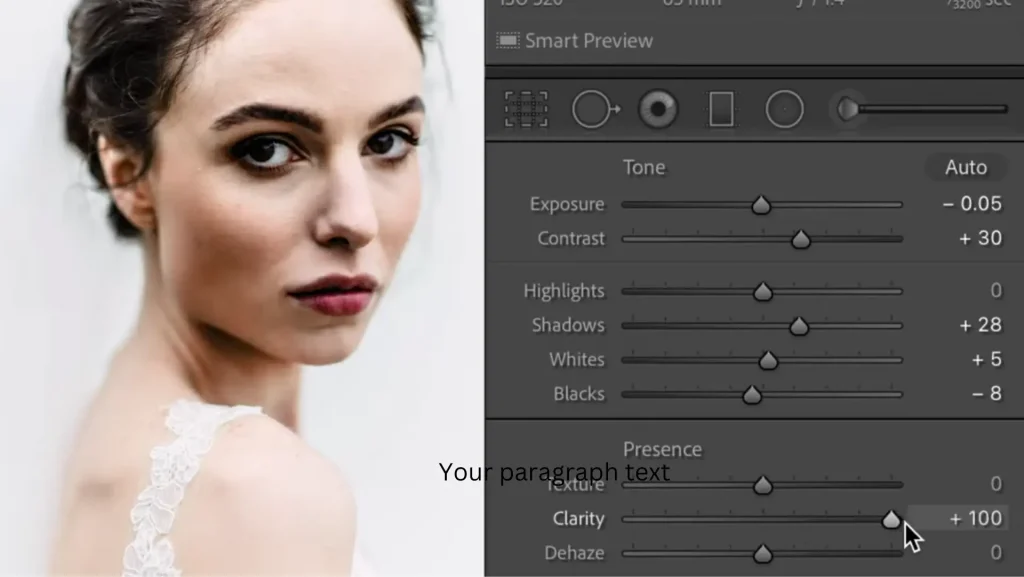
Clarity has been around for a long time so it’s probably the one that most people are familiar with the way that the clarity tool works is by increasing contrast in your image mostly in the mid tones. So if you were to look at the histogram up on the right while I move the clarity slider I’ll see that basically what it does is stretch out our histogram making the black point lower and brightening the whites. So I’ll see our histogram normalizes again so it’s dragging down the shadows bringing more of the whites up.
When we increase the clarity it also impacts the saturation of the skin tones because contrast impacts the saturation so this results in a bit of a punchy crunchy look in portraits which creates a kind of zombie look!!. So not typically what we’re going for flattering skin tones. See also Lightroom Pro apk
.
Method no 2:(Reverse Clarity Soft Skin)
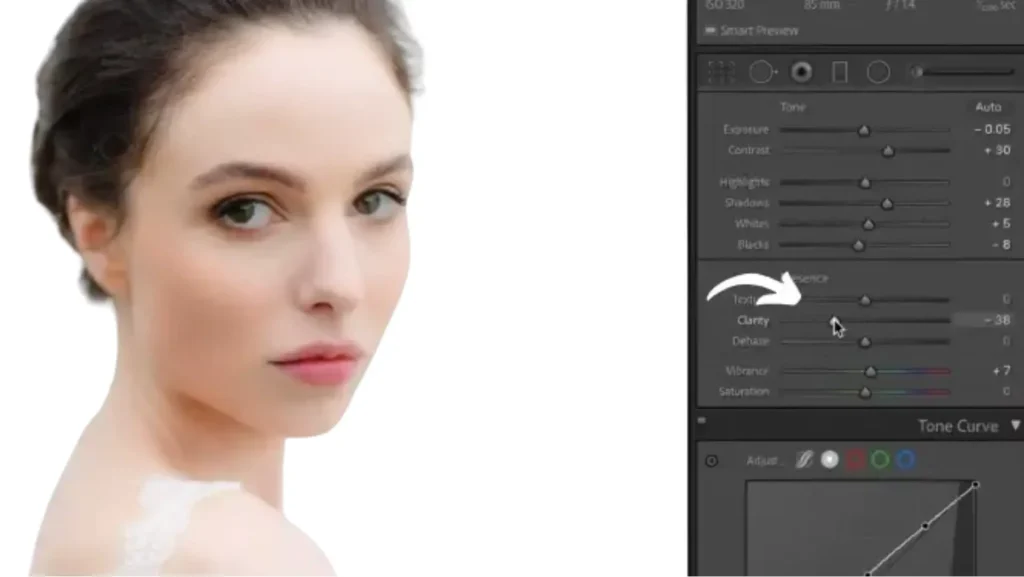
The one thing that clarity used to be great for is if we reverse clarity in the opposite direction it has the opposite effect, lowering contrast. But again it;’s not ideal because of the impact has on the colour of the skin by increasing that saturation and altering the skin color. So you can use the reverse clarity feature and easily edit your photos and easily edit remove your face horrible pimples, the darkness of the face and eyes, etc
Method no 3:(Use the Texture Slider)
(Step no 1)
More recently, Adobe Added the texture slider and this has pretty much replaced what I should do with the clarity tool the Lightroom. and that’s because the clarity impacts the mudstone texture only the edge detail so if we’re to zoom in here a little bit more and play with his tool and drag it up I’ll see if it allows us. Either Sharphen with a very natural look. I don’t recommend applying this across a full image it’s best for selective image retouching so we will take this off and then come up with our adjustment Brush tool.
(Step no 2)
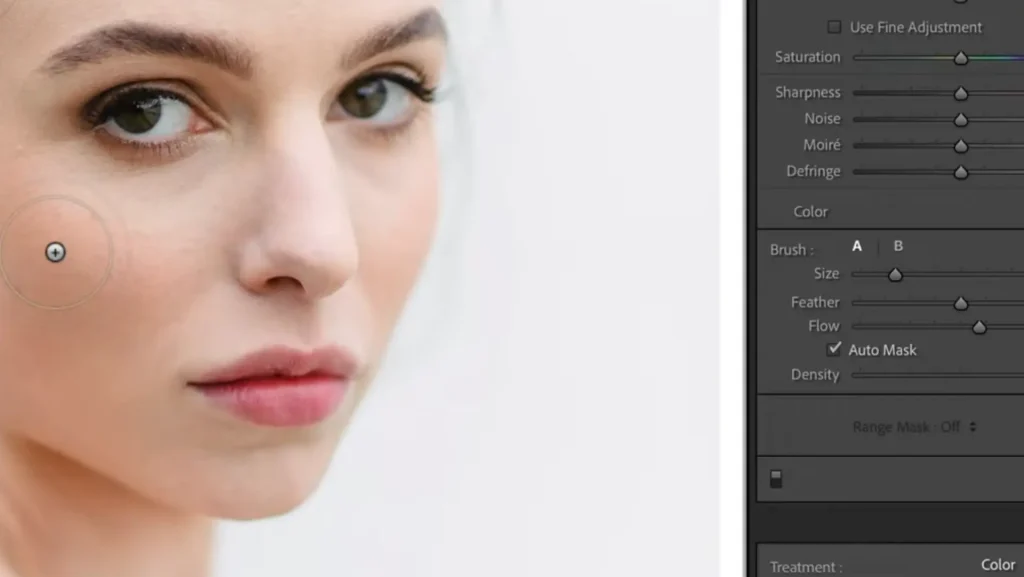
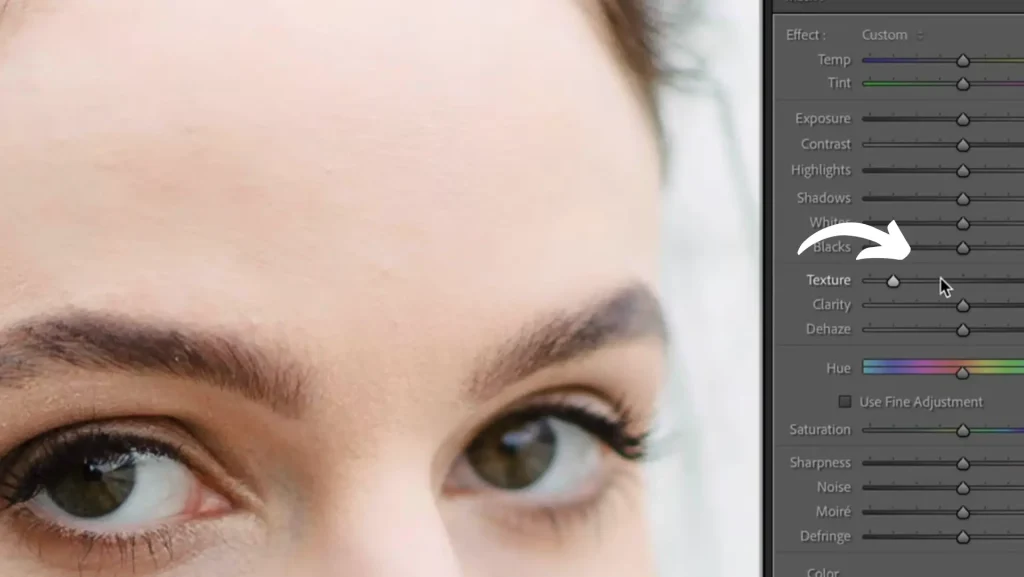
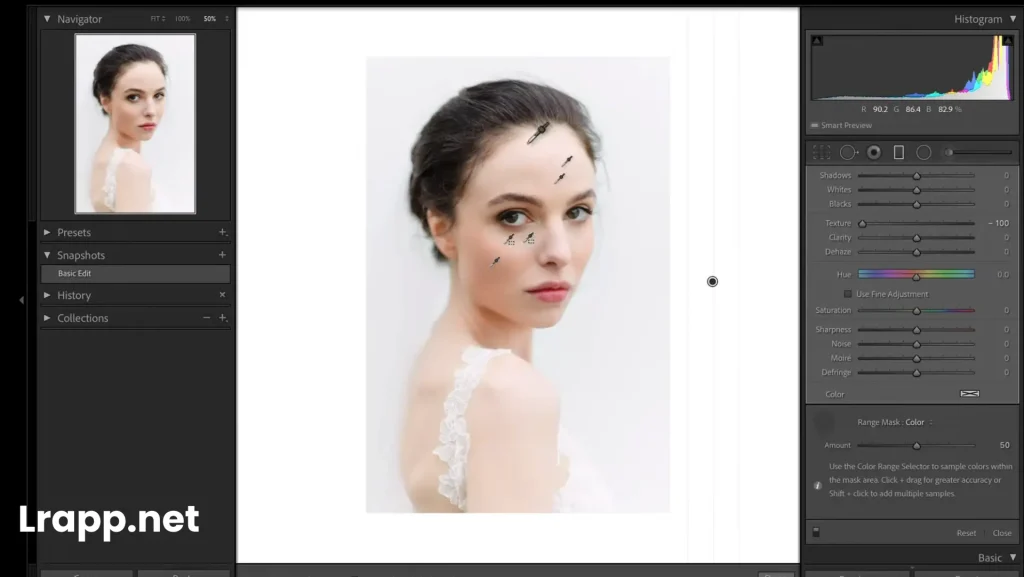
So, we’ll go ahead and bring the texture down to navigate 100% because I like to generally extreme so you can see what you are doing, and then for our settings Feature controls the edge softness of your brush. and I generally like to keep that at about 50 to start which gives us a nice soft edge without it spilling.
(Step no 3)
This Step probably around 30 would be what I would typically do for an image like this she doesn’t have very very bad skin but you can see if we delete it and back on again it just softens out.
Method no 4:(Radial Adjusment Brush to color)
Radial Adjustment Brush if you were the just come to the outside of our image what happens is the adjustment brush is applied across our entire image here and the texture down to negative 100. look at the bottom-of-the-range mask option and turn this into a color and then we’re gonna come to the little color picker here. You could either a different points on the skin holding down shift to select the different colors within the skin tone and make sure you get the highlights and also the shadows and mids.
Frequently Asked Question(FAQS)
Conclusion
In conclusion, people Lightroom Getting Soft Skin in 2025 you can make your skin look softer in Lightroom using the tools like the adjustment brush. By considerably lowering clarity and texture they keep the skin looking natural while making it smoother. You can adjust brush settings let them implement changes exactly where needed and change complications to ensure are not too strong. So you can apply 4 methods that you can discuss you can easily edit your photos. Moreover, you can read how to Culling Photos in Lightroom Classic and then move this article.

I am the founder of lrapp.net, I am passionate about bettering your photography experience with our expertly crafted Lightroom mod APK. With years of experience in photography and digital editing, I aim to provide users with unparalleled tools to unlock their creativity. Join us on this journey to elevate your images and transform your editing skills!


