(How can we use Lens Blur Panel 2025 in Lightroom Classic)
Have you ever wondered what the lens Blur Panel is Lightroom Classic? Today we are going over the Lens Blur Panel tool that lets you easily create a professional blur effect by allowing you to customize the plan of focus as well as depth of field in your photos. Lens Blur is a brand-new early-access tool that allows you to customize and change the depth of field and the plan of focus inside your photo.
In this article I will tell you how you can blur and improve the background of your photos you can add a watermark by using the Lens Blur panel in Lightroom Classic, so now we move to our article and read the few steps.
4.9
APPROVAL
10.3.1
VERSION
Step1:(Load Up Lightroom Classic)
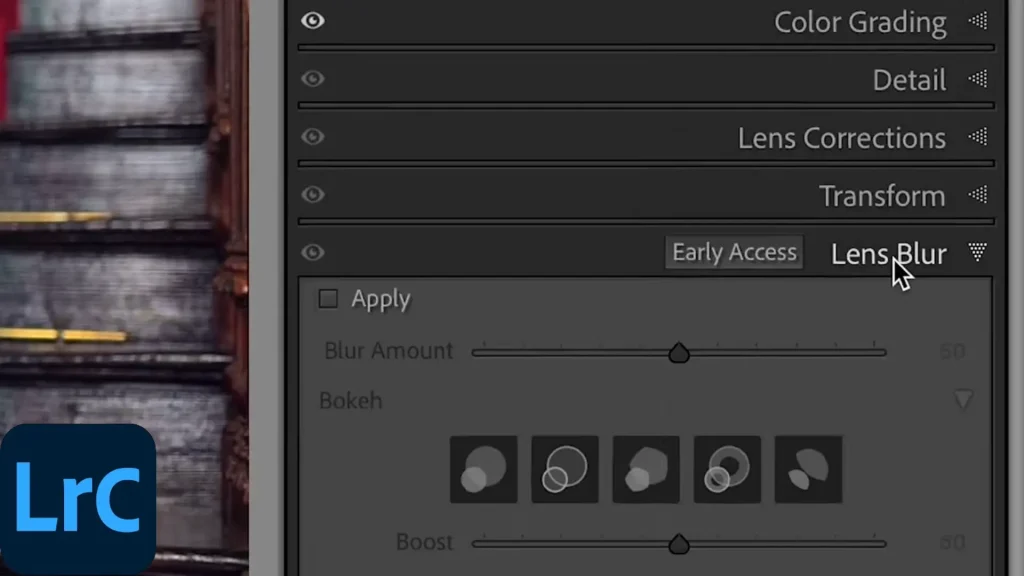
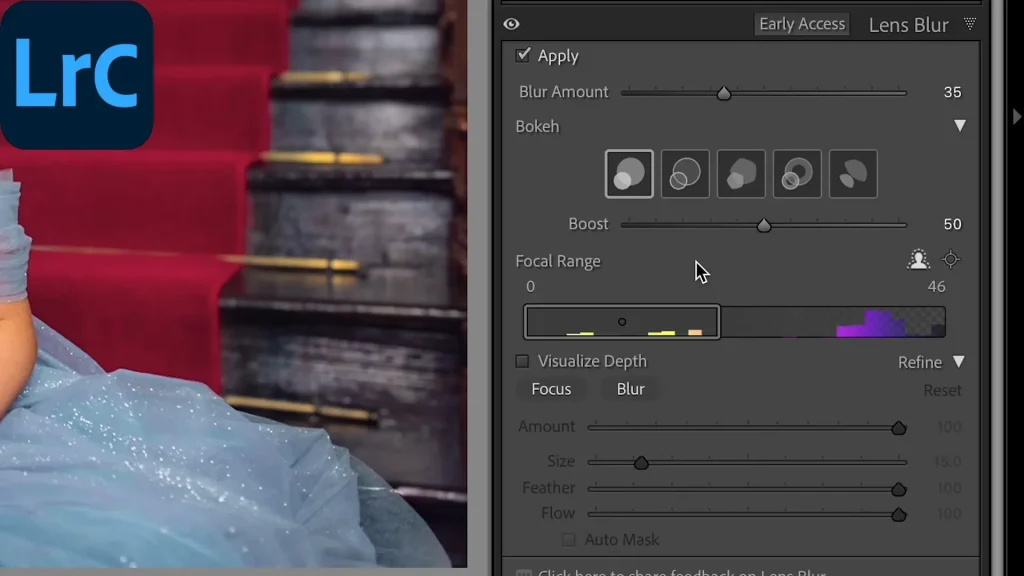
You go over to the develop panel on the right-hand side then you can drop down in between where you can say it transform and effect we have got lens blur. So I am going to ahead and open up that panel now at the moment everything is covered out that’s because we have not applied this effect to the photo yet so I am going to simply go forward and click apply now.
Step2:(Adjust Lens Blur Panel Settings)
You can easily increase the amount of blur by simplifying increasing and decreasing the amount but I suggest you can only 35 It seems to get a nice realistic look. Now underneath that, you have your bucker control you have five different options here which we go over in a second as well with the bokeh slider. Inside the blur panel, you can see several sliders that allow you to control the blur effect. See also the Lightroom app The main sliders typically include Rotation, Radius, blade curvature, Amount, etc.
(Rotation)
Rotates the direction of the blur effect.
(Radius)
Adjusts the size of the blur effect.
(Blade curvature)
you can easily change the shape of the blur to simulate different lens characteristics
(Amount)
You can control the strength of the blur effect
Step3:(Set the Focus Range in Lightroom Classic)
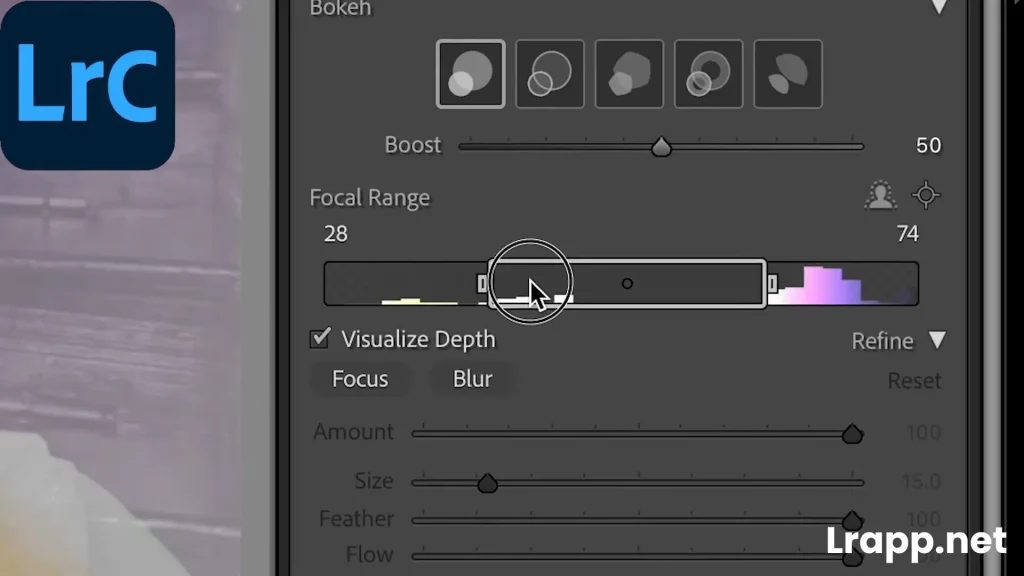
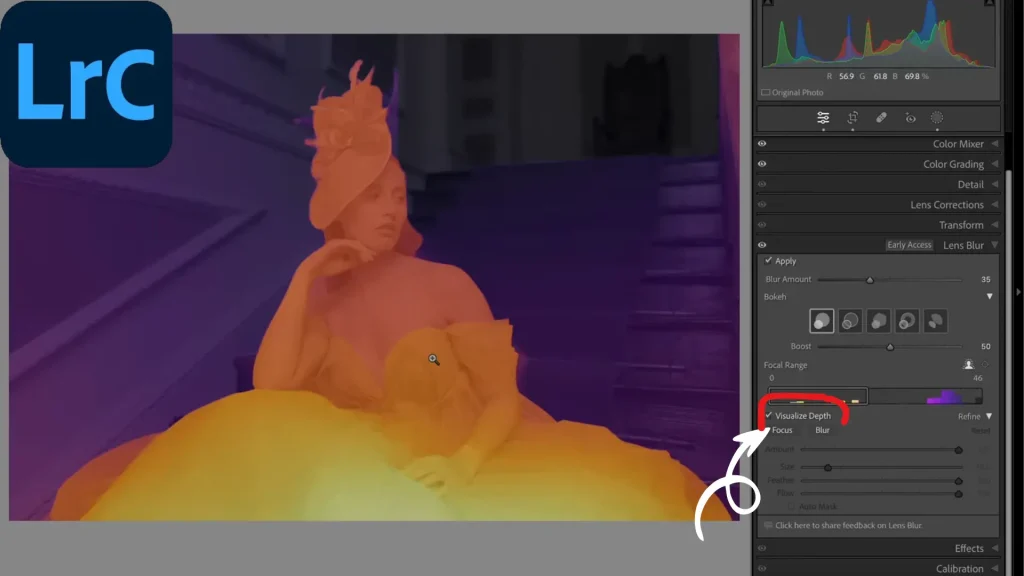
Simply you can go down to the bottom here and click on visualize depth now you can see it temperature color laid over the photo so what’s very close to your plane of focus is this kind of yellowish color the further you go away the orange color the background is predominantly this very dark blue the way to Black.
Step4:(Set the background and Forground)
You can go to this slider here and move it left and right in doing so you are changing that plan focus for example: If we wanted all the information focussed on the background we can do that so what I’ll turn off is visualize depth.
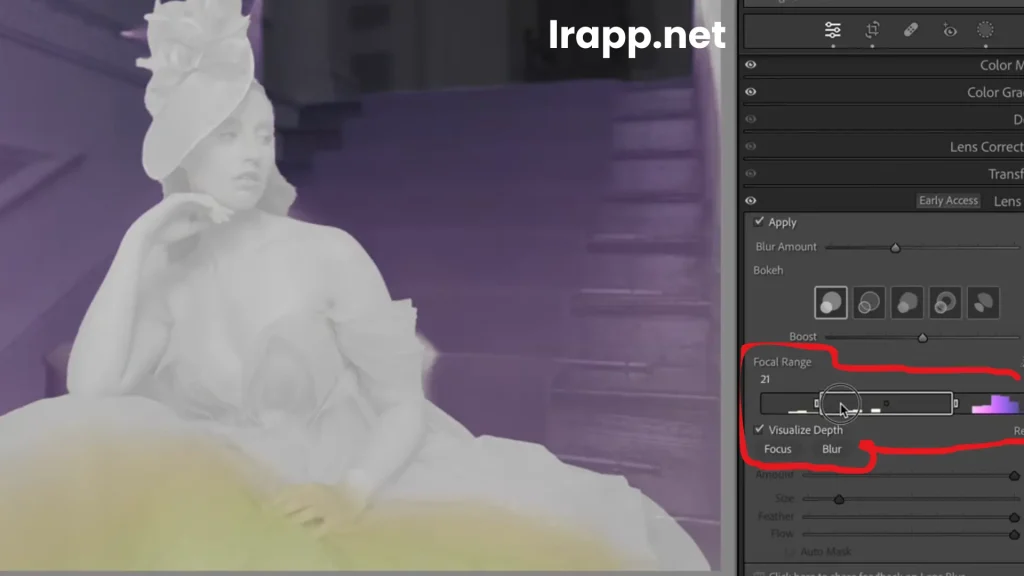
(Set the Foreground)
Now the Foreground is Blurry.
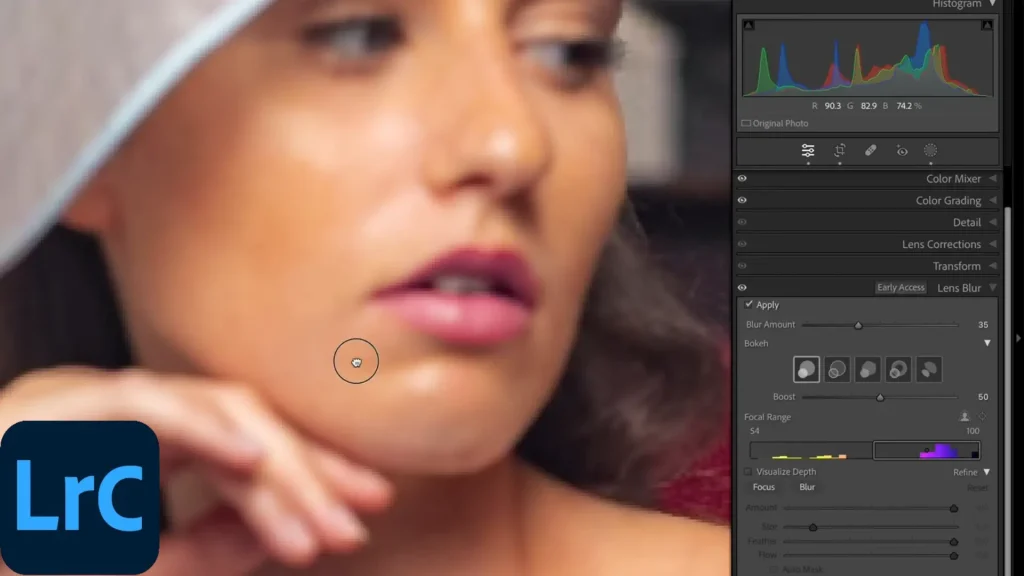
With this slider, you can change where the focus is on your photo so for example We wanted it on the background or we wanted it in the foreground and we can move it around. Moreover, you can also have these buttons here that allow you to change that as well so this here is your subject selection, and the other button is target selecting.
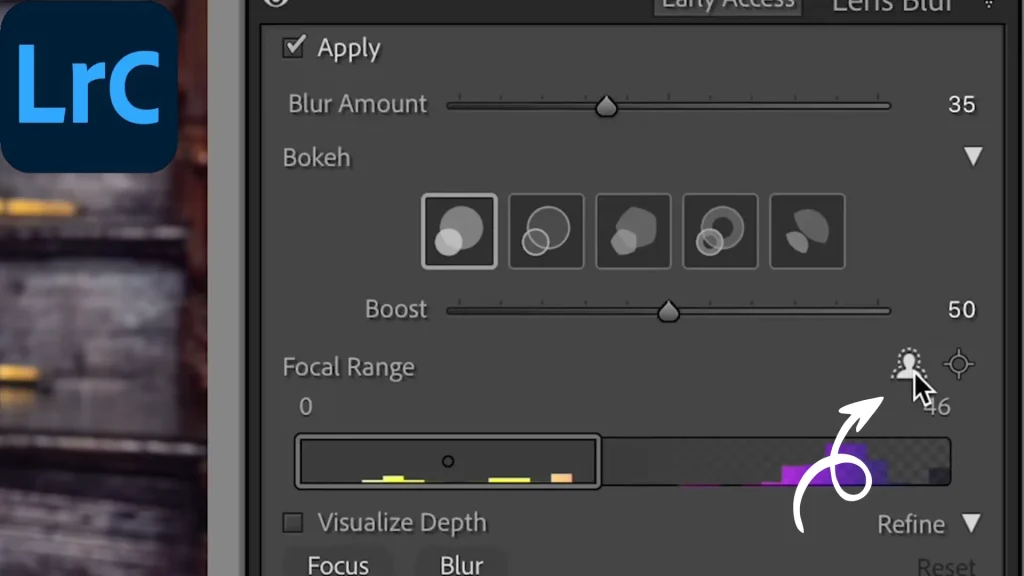
Step5:(Set the Target Selection in Lightroom Classic)
This is better when we are working on landscape photography. For Example: if you are focusing on maybe a rock in the foreground you want everything else to be blurred in the background you could focus on that rock or you could focus on the sky or anything like that you just target what you want in focus and Lightroom Classic will change it accordingly.
Now you can go to the anchor points on the left and right what we can do is move these around so you can create a very shallow depth of field to replicate maybe a lens of f1.2 or f1.4.
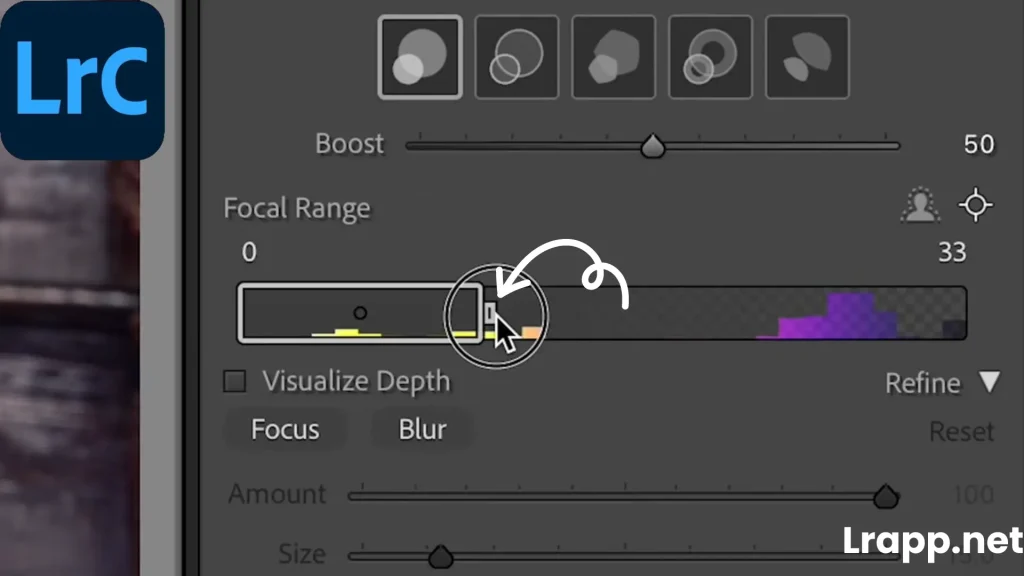
We could narrow that all the way to find where that subject is. For Example: we have a look at that depth map where we want to go for this kind of orangey color we could probably go for about that there again having it subject or what we can do is simply go to that target icon and simply target the eyes so again we’ve widened ever so slightly but again what we can do is go in we can refine it to get the exact results that you are after.
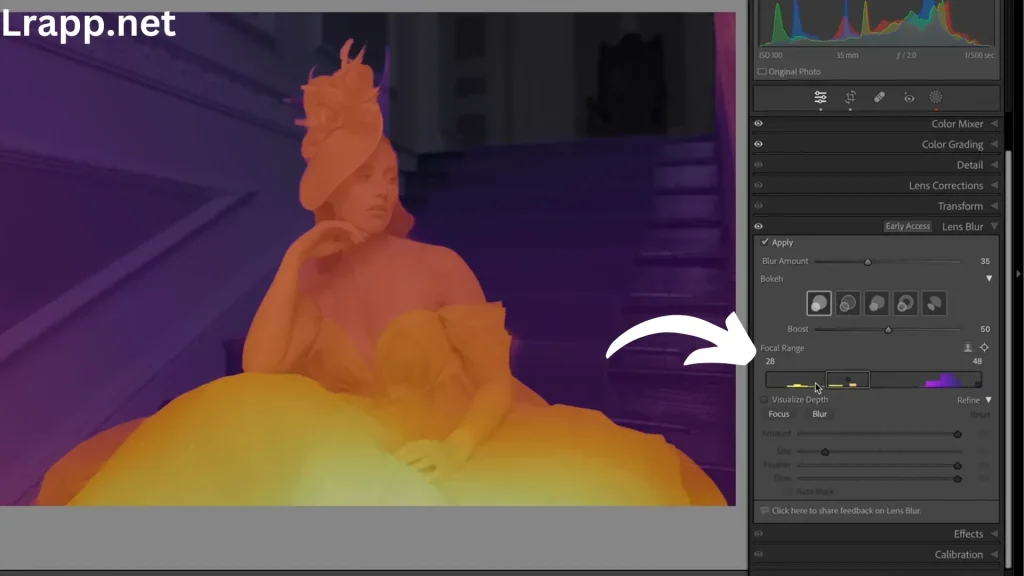

Step6:(Export or Save)
Once you are happy with the result, you can easily export the image or save it with Lightroom Classic. So if you fixed Fix Underexposed Sunset Portrait you can easily read it.
Frequently Asked Question(FAQS)
Conclusion
In conclusion, We covered six steps in this article, including loading, adjusting the lens puller panel settings, setting the focus change, setting the background and foreground colors, and center target selection. By following all these steps, you can easily use the Lens Blur Panel in your photography journey.

I am the founder of lrapp.net, I am passionate about bettering your photography experience with our expertly crafted Lightroom mod APK. With years of experience in photography and digital editing, I aim to provide users with unparalleled tools to unlock their creativity. Join us on this journey to elevate your images and transform your editing skills!

